If you’ve ever installed a pipe-style snow guard, you know there are accessories that were designed specifically to be used with the system. Some are necessary requirements of a successful snow management system, while others are optional additions that were designed to beef up the way your system manages the snow on your roof.
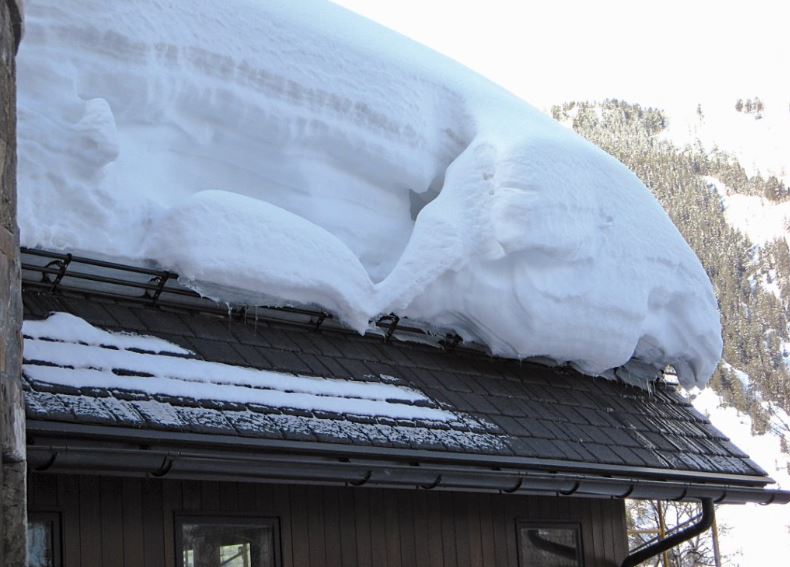
It’s important to note that most snow guard accessories are used to create a completely secure, rugged system that is also aesthetically pleasing. Equally important to note is that accessories and systems should be installed to Alpine’s specifications. Our Online Project Calculator is a great resource for generating an Alpine SnowGuards recommended layout for your project.
#1 – 1” O.D. Pipe (SKU: PP75)
I’m aware that this is a self-explanatory one, and it’s also a very important one, so it’s a great accessory to start with. The pipe that’s used for our pipe-style snow guards acts as a barricade system, preventing large pieces of snow and ice from falling off a roof. Our systems are available in two-pipe, three-pipe and two-hi pipe configurations, and are available in a variety of materials, including Aluminum, Stainless Steel and Brass. Our standard pipe is 1” O.D.
#2 – Internal Coupling (SKU: PP86)
Our Internal Couplings come assembled and ready for installation. As the name implies, an Internal Coupling is a component that acts much like a splice plate, and is used to connect pipe lengths together, making a continuous run possible.
To install Internal Couplings, follow these 4 easy steps:
- Insert assembled coupling into the end of one pipe so that half of the solid aluminum shaft is inserted.
- Begin twisting the exposed half of the coupling in a clockwise motion until the rubber gasket engages the pipe. Continue to tighten until the coupling cannot be easily pulled out of the pipe.
- Slide the next section of pipe over the exposed half of the coupling. Twist the pipe in a clockwise motion until the rubber gasket engages the pipe.
- Continue tightening until the pipe cannot be easily pulled apart.
If the system needs to be dis-assembled, simply turn the pipe counter-clockwise until the pipes can be pulled apart.


#3 – External Coupling (SKU: PP84)
Just like its cousin, the Internal Coupling, the External Coupling is also used to connect pipe length together, however this component goes on the outside of the pipe. The External Coupling features a Centering Dimple, which ensures proper placement on each end of the pipes that are being connected.
External Couplings are also easy to install – just follow these 2 steps:
- Install pipe and slide external coupling over the end until the pipe end contacts the dimple.
- Install the next pipe, sliding it in until it contacts the dimple.
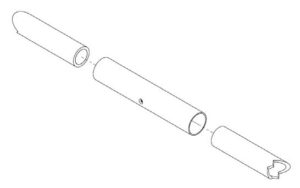
#4 – End Cap (SKU: PP56)
An End Cap is the cap, or plug, that’s inserted into the end of the pipes to restrict moisture, humidity and insects from entering the pipe. End Caps also finish things off nicely, creating a “clean” and finished appearance.
Install the End Cap by pressing it into the end of the pipe.

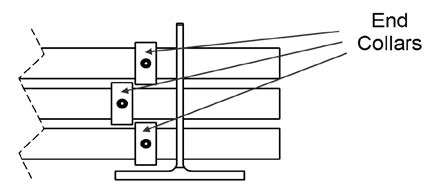
#5 – End Collar (SKU: PP65)
End Collars are a necessary component of pipe-style systems, as they keep the lengths of pipe in place while avoiding lateral movement.
End Collar application:
If using on a system with External Couplings, End Collars should be placed over the end of each run of pipe, on the inside of the outermost brackets (see below). As the last pipe in the run is installed, the End Collar should be installed. The End Collars should be installed 1/2” from the brackets.

If using on a system with Internal Couplings, End Collars should be placed over each end of each run of pipe. Place the End Collar over the pipe and tighten the set screw until it no longer slides. The End Collar should be within 1” of the snow guard bracket, spacing is 1/8” for every 10’ of pipe. For example, if the run of snow guards is 80’ then the End Collar should be 1” outside the bracket (see below).
#6 – Ice Flags – Optional (SKU: PP95)
What ice flags do is provide additional surface area, meaning additional snow management properties, especially in locations with heavy snow loads. Ice Flags hang from the pipe between the brackets to help keep ice and snow from sliding underneath. We custom cut our Ice Flags to work with your system, and with the profile of your roofing material.
Note: Ice Flags must be installed on a system with at least 2 pipes, and should not touch the surface of the roof.
Ice Flag installation: For fixed three-pipe brackets, the Ice Flag should be installed on the top pipe. For adjustable three-pipe brackets, the Ice Flag should be installed on the middle pipe. For all two-pipe snow guards, the Ice Flag is installed on the top pipe. The long leg rests against the uphill side of the pipes.
Use the bolt and nut to hold the flag in position. Silicone or adhesive may be applied (optional) between the Ice Flag and the pipe to keep the flag from sliding.
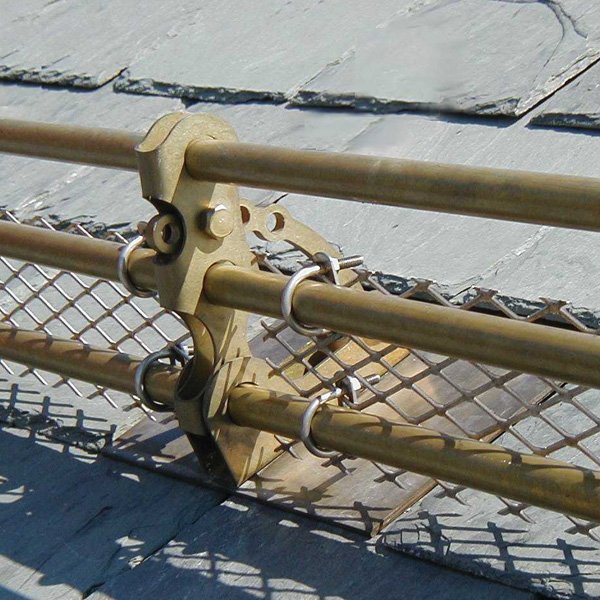
#7 – Ice Screen – Optional (SKU: PP98)
Ice Screen comes in 4’ lengths, 5” high; for most installations it will need to be cut to size to fit between the snow guard brackets.
Here’s how to install Ice Screen:
1.Place the Ice Screen behind (upslope) the installed pipes.
2.Place a U-bolt on the pipe and fit it through the openings in the Ice Screen.
3.Place the backing plate behind the Ice Screen and insert the ends of the U-bolt through the openings.
4.Tighten the supplied locking nuts.
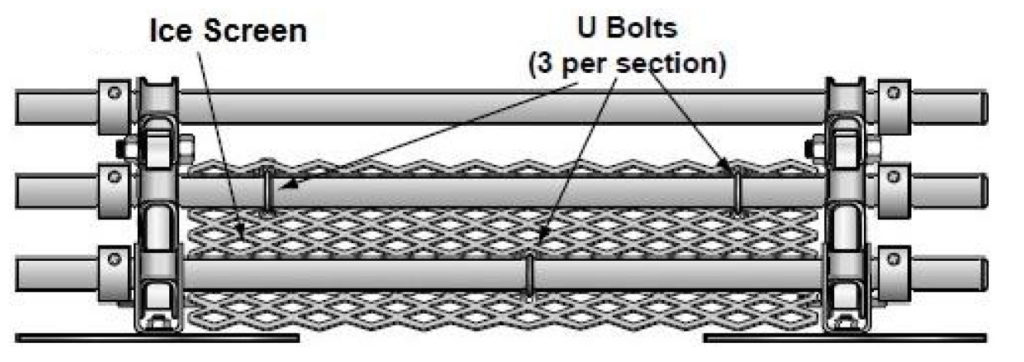
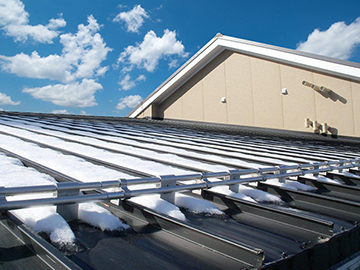
Each length of Ice Screen includes 4 U-bolts, 4 backing plates and 8 locking nuts. Ice screen should be attached behind the bottom two pipes in a three-pipe installation (as shown below) or on both pipes of a two-pipe installation. Note: 2 U-bolts are to be used for sections 24” or less. 3 U-bolts are to be used for sections greater than 24”.
Using our PP225 three-pipe system as an example, below is what a typical installation would look like.

You can view our entire Pipe-Style product line here. And remember, Alpine SnowGuards is your source for CUSTOM snow guards, which we engineer and design on a project-specific basis.
There you have it. Accessories at a glance. If you have any questions at all, please let us know – after all, that’s what we’re here for!

We keep snow in its place
888.766.4273
![]()
![]()
![]()
![]()
![]()
Subscribe to our monthly newsletter and keep up on the latest industry and Alpine news, products, and upcoming events!
Alpine SnowGuards® designs, engineers, and manufactures snow management systems from our facilities in Morrisville, VT. We work closely with leading roofing contractors, engineering firms, developers, and roofing manufacturers to ensure we deliver quality products that do what we say they’ll do.